Sketch Cleanup #
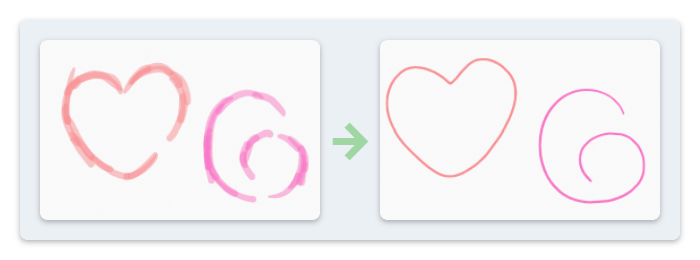
NijiGPen's line operators provide functionality that helps turn raw sketches into final line art. A raw sketch usually contains repeated strokes, line splits, and line gaps that require a lot of manual effort to clean up. The Line Fit operators can speed up this process by merging multiple strokes into a single, smooth stroke.
Fit Sketch to Single Line #
Edit mode. The Single-Line button turns all selected strokes in the active frame to one new stroke.
The process of merging multiple strokes is automatic. However, in order to get a smooth output, there are two options to configure:
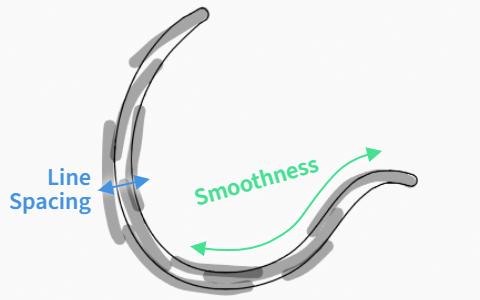
Line Spacingdetermines a range, within which the lines drawn in parallel will be smoothed.Smoothnessuses either Bézier or vertex-level method to make the output stroke smoother.
Basically, they control the smooth level in two orthogonal directions, which is indicated in the following figure:
Inherit Point Attributes #
By default, the radius of the output stroke points is determined by whether the sketches are densely or sparsely drawn. The point strength/opacity will be set to 1. However, the user can also choose to use the strength/radius value from the input strokes.
Vertex color and line UV can also be inherited from input to output.
Fit Sketch to Multiple Lines #
Sometimes the sketch is complex, and the user may want to convert it to multiple lines instead of a single one. The Multi-Line button will attempt to categorize the input strokes into clusters, and perform the line fit for each cluster separately.
The algorithm measures the distance between each pair of input strokes in a pointwise manner to determine which strokes belong to the same cluster.
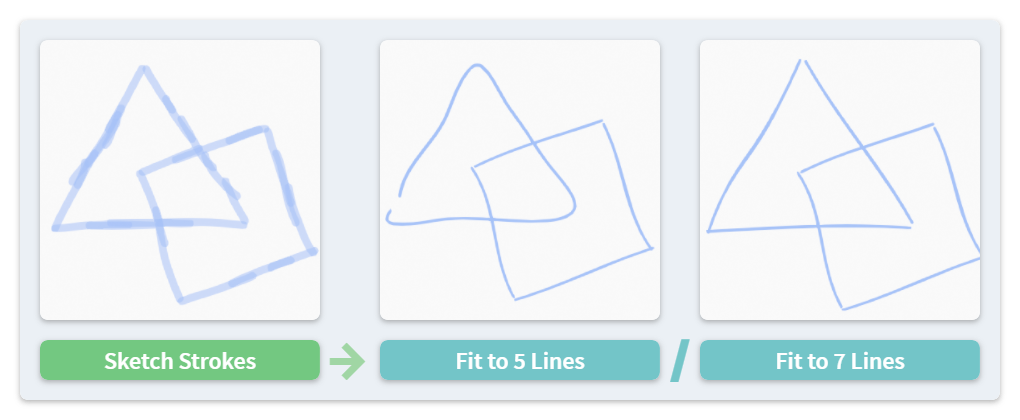
The number of clusters is important, as shown in the figure above. There are several options to tune this value:
- By Absolute Distance: Specifying a length as the maximum distance between strokes in the same cluster.
- By Relative Distance: Using a ratio of the stroke length as the maximum distance.
- By Number: Setting the maximum amount of clusters.
In addition, by enabling the option Separate by Vertex Color, strokes with different vertex colors will never be categorized into the same cluster, regardless of their proximity. Therefore, the user can use vertex colors to provide some manual guidance to the clustering algorithm.
Cluster Select #
The Cluster Select button applies the same criterion to find similar strokes (i.e., having a small pointwise distance) with the selected ones. However, it enlarges the selection instead of fitting the strokes. This operator can be used to select strokes which may belong to the same part of the drawing.
Multiframe Fit #
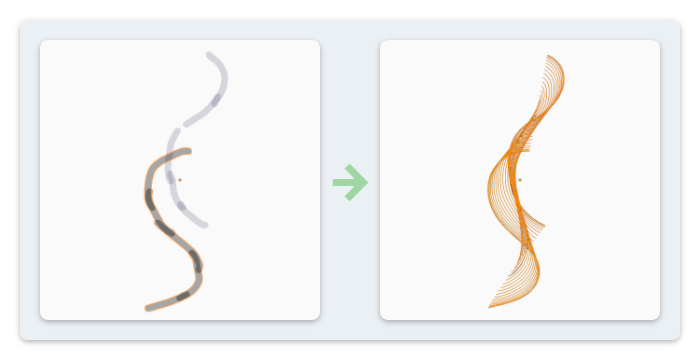
When Multiframe mode is enabled, and input strokes are from more than one keyframe, the operator will generate a new stroke for each keyframe.
The option Animation Sequence performs an additional fitting across multiple keyframes, making it possible to generate smooth animation of output strokes. Multiple animation styles are provided:
- Interpolation: Point-level position interpolating, which is similar with Blender's default
Interpolate Sequencemethod but smoother. - Trajectory: Making the stroke move smoothly along a curved path longer than itself.
- Rigid Body: Treating the stroke as a rigid body, estimating its overall transform (translation/rotation/scale) while ignoring its shape morphing.
Animation Curve #
By default, the animation is interpolated linearly. The user can choose to manipulate the speed of animation with a curve, so that easing-in/easing-out or more complex animation patterns can be achieved. Before using an animation curve, the user needs to first click the button Enable Animation Curve in the side panel, because Blender has a constraint that an add-on cannot use a curve as its property directly.
Fit Sketch in Draw Mode #
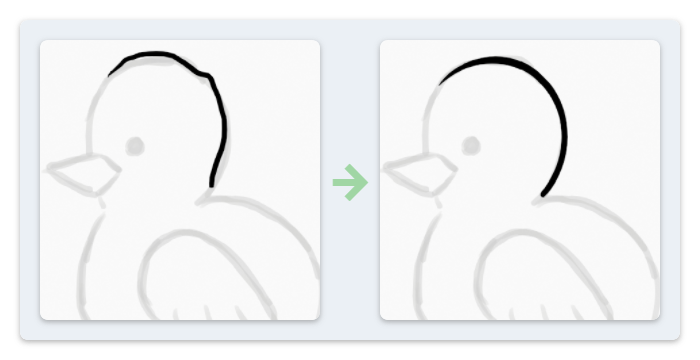
The sketch cleanup can also be performed in the Draw mode through the Fit Last Stroke button, where the add-on converts the recent drawn stroke(s) in the active layer to a smoother one. There are three modes:
- Single Stroke: The add-on simply smoothes the single latest drawn stroke.
- Same Vertex Color: The add-on detects all recent drawn strokes with the same vertex color, then merges them into a single smooth stroke and clears the vertex color.
- Reference Layer: This mode requires the user to assign another layer containing the sketch as the
Reference Layer, and then draw the line art in the active layer. The operator will refine and smooth the latest drawn stroke according to the sketch.